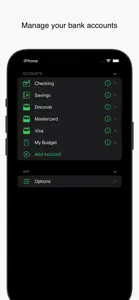
With Finance you can enter and keep track of all of your checking, savings, and credit card transactions and create and manage a budget.
Finance uses iCloud to keep your data in sync across all of your macOS, iOS, and iPadOS devices.
Finance makes it easy to add new transactions by only asking for relevant info based on the account and transaction type and makes data entry a breeze with time-saving description labels and categories. Finance can create some default labels to get you started. Don't have the right label for a transaction? Just select “Add Label” at the bottom of the menu to enter and assign a new one. When it comes to entering an amount, simply type it in, or you can use an itemize list with multiple amounts that total for you.
Finance also saves you time by creating a linked credit in another account from any debit transaction (such as making a transfer or paying a bill). Changes are reflected when you edit either one and both are removed if you delete, but if you delete an account, it knows enough to remove the link and keep the one in the remaining account so your history and account balance remains correct.
A convenient section below the transaction list shows your current account balance at all times including colored status dots to alert you to issues. Reconciling your balance with your bank statement or website (you can go to it from the account list) is as simple as checking cleared items. You can also check purchases in your credit card accounts as you pay for them so it’s easy to keep track of pending ones.
No need to endlessly scroll if you are looking for something. You can select a category from the label popup menu above the list and it will filter your transactions to show only those assigned to it. If you want to be even more specific, use the search field above the list in the selected account to find what you're looking for. If your list is filtered, Finance will search only items assigned to that category.
Finance enables you to easily create a budget linked to a checking or saving account to help you manage your money. When you do so, Finance generates a “General Funds” budget item and places the current amount available into it. You can create funds and enter the amounts for monthly bills. Use the divide by feature to take out a smaller portion of your income as you build toward the total due. Once you cover your expenses, you can also set up funds to take out a percent of whatever remains if you're saving up for something special. You can also set a goal you would like to reach and even cap the total the funds can hold.
Once your budget is set up, the rules you created run in the order they appear (to rearrange the order, simply tap-and-hold and then drag them) whenever you add to your linked account and choose to apply to budget (it generates all the transactions for you as it distributes the money). If you don't apply to your budget, the total goes into “General Funds”. When deducting from your linked account, you can choose which funds the money will come from. The budget overview provides an up-to-date status of your funds at all times.
Your budget is not set in stone. You can easily transfer money from one fund to another. You can edit your funds, delete funds that are no longer needed (remaining money will be placed in “General Funds”), and set up new funds. Your changes take effect next time you add to the linked account.
Finally, you can see Finance in a while new light with dark mode. Simply select your preference in the system settings on macOS, iOS, or iPadOS.
Show less


